Anyone who knows me know that I am OBSESSED with rabbits! Anything with a bunny on it and i’m in! I literally have about 6-8 bunnies hanging around my room. No joke theres stuffed bunnies, ceramic bunnies, rose gold and moss green bunnies. I guess you could consider me to be one of those old ladies that collects spooky dolls but bunny edition HAHA.
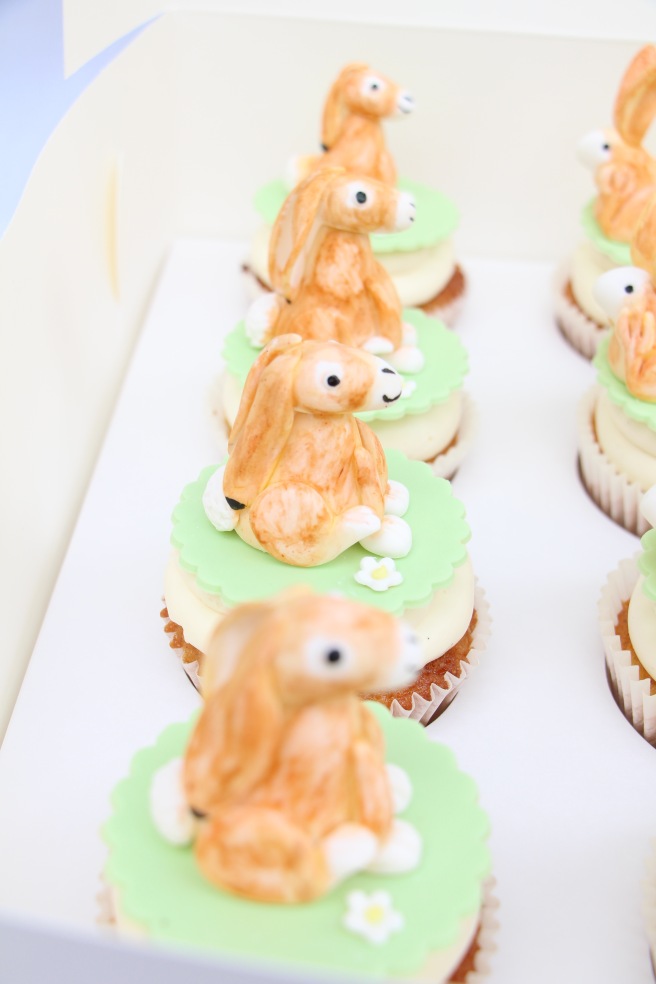
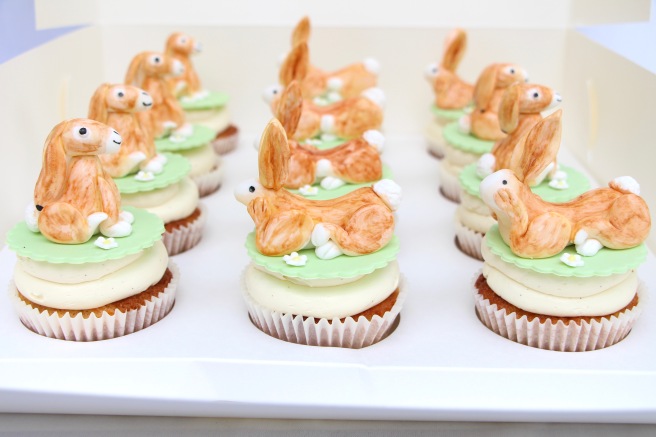
I’ve also had 2 pet rabbits in my lifetime so it’s not just faux bunnies that i’m obsessed with, my fur babies were even cuter! Now that i’ve revealed my strange obsession with rabbits let’s now explore my long awaited desire to create something peter rabbit, or in this case the nut-brown hare! I was so excited when I was asked to create cupcakes according to this theme and so when I was designing these cupcakes I actually didn’t know where to start! I often get inspiration from the characters themselves. I happened to have a tin with the characters on it and inside are cute little nutbrown hare themed chocolates, a special gift from my nene (grandmother). I then had the idea to use the stories of the nut-brown hare as inspiration for the cupcakes! I wanted to recreate a scene from the book “Guess how much I love you” where little nut-brown hare and the nut-brown hare are staring at each other ever so lovingly!

PS Check out my watermark, pretty fancy hey 😉
Anyway, heres how I made the little nutbrown hare, enjoy!
I used white fondant and hand painted it brown to match the colours in the book. You can do the same or use a light brown fondant and a bit of white.
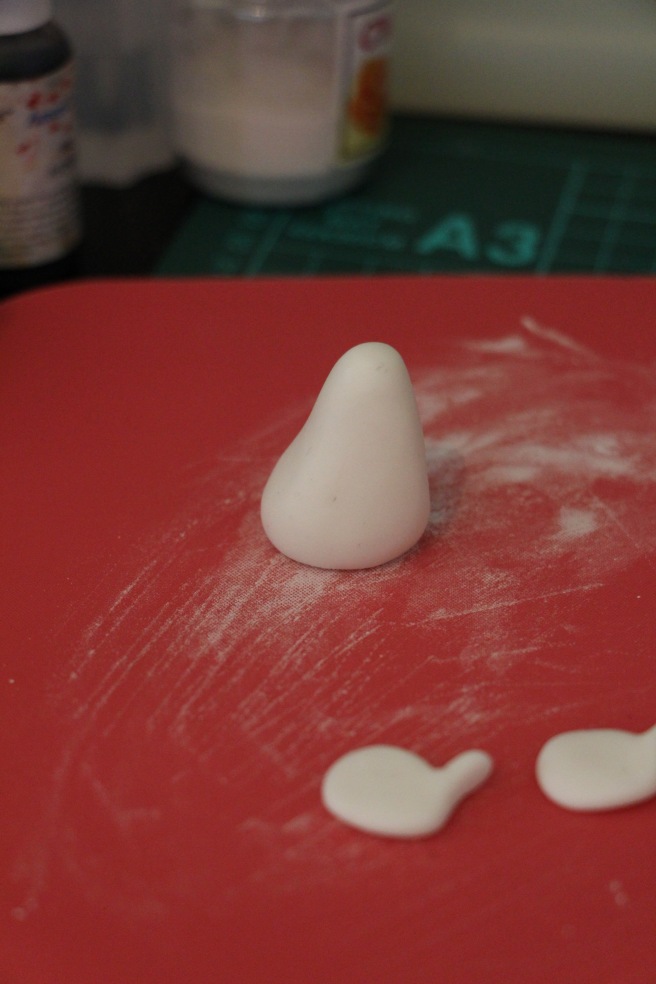
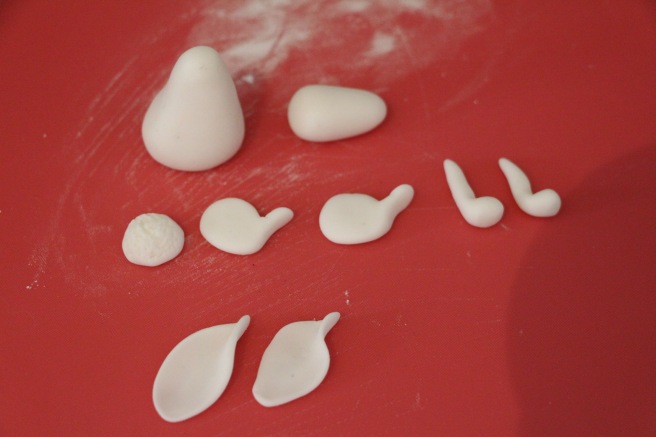
Firstly, roll a ball of fondant with one side being thicker than the other and then shape it like shown in the image below.
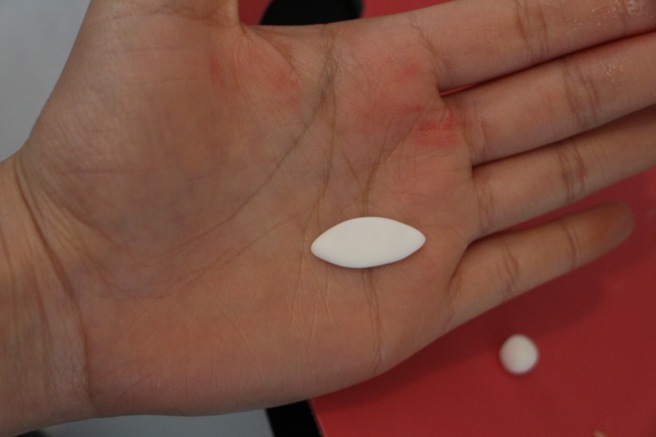
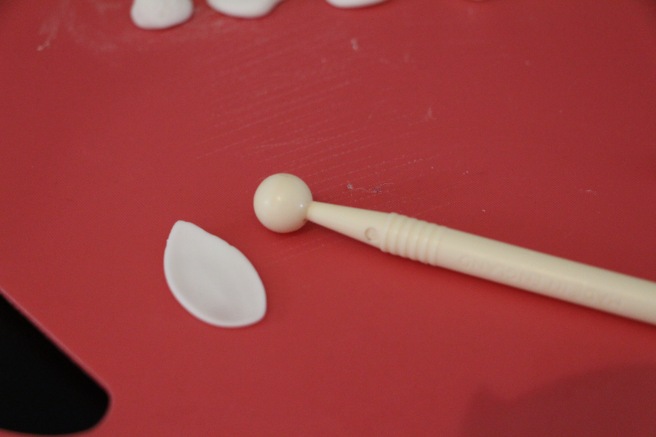
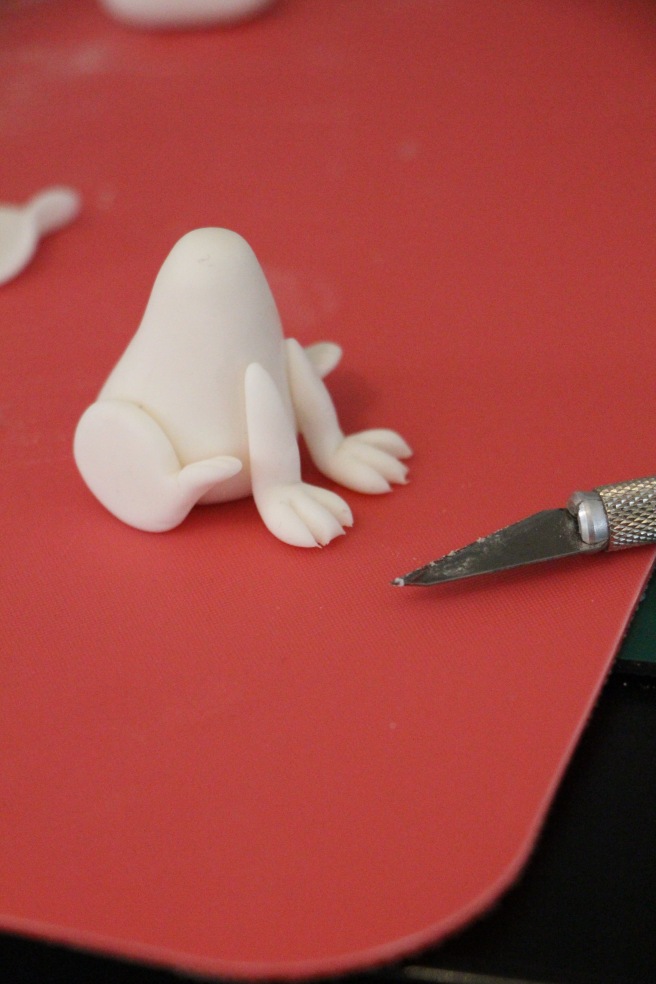
Now to make the little thighs and feet that sit flat against the side of the body. Youll need two of these. Start by rolling a little piece of fondant with one side thicker than the other and leaving one end with a slight ball to act as feet. I didn’t manage to take a picture of them individually but they are seen in the bottom of the image above in a blur (sorry guys!). flatten the large side slightly and arch the little foot upwards. You can also choose to add some detail to the top of the foot by cutting two slits into the foot (you’ll see in the images later).
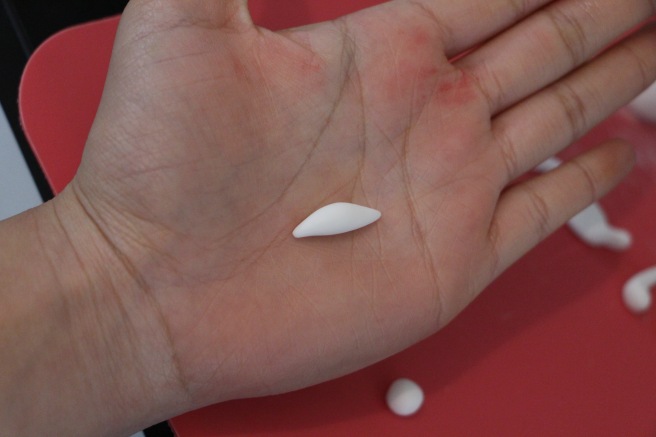
Once you’ve made two, leave them to the side and work on the arms or paws whatever you want to call them.

Make two of these arms and add the same details you added onto the foot/thigh, onto the ball of the arm.
Ok so I also forgot to photograph the maing of the bunnys head, just roll a decent sized ball of fondant into a slight football shape with only one side being a football? Youll see what I mean shortly!
Now to make the ears take a ball of fondant and roll both ends into a little point, leaving the middle bit fatter.
Once you have two of these, flatten them slightly.
Then, using a ball tool, flatten them out in the middle to further enhance the centre and achieve that dented ear look.
Once you’ve made the ears you can work on that cute little bunny tail by using a small round ball of fondant, flattened slightly and then pricked with a tooth pick to give it that fluffy texture! Now you have all the pieces you need to mak this little guy, but lets juat make sure! ROLL CALL!
- Body
- Head
- Bunny tail
- 2x ears
- 2x thighs
- 2x arms
Lets put it altogether!
Using a little bit of water and a paint brush, glue the thighs to the sides of the body and add the little slits using an exacto knife or a tool of your choice to the top of each foot. (Refer to image)
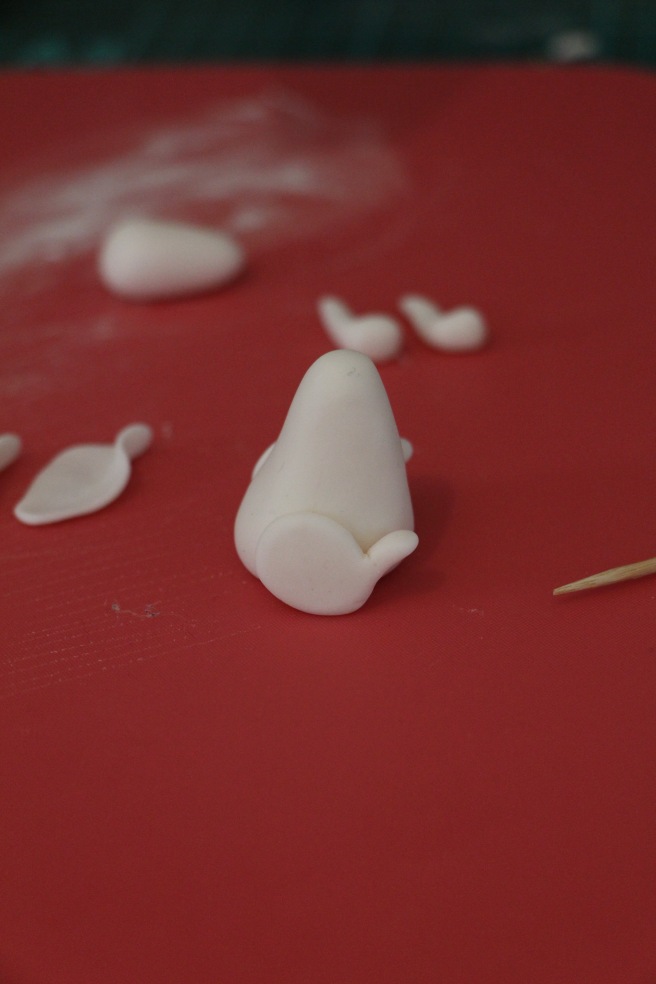
Next, glue on the arms to the front of the body and cut slits into the balls of the arms to create the look of paws.
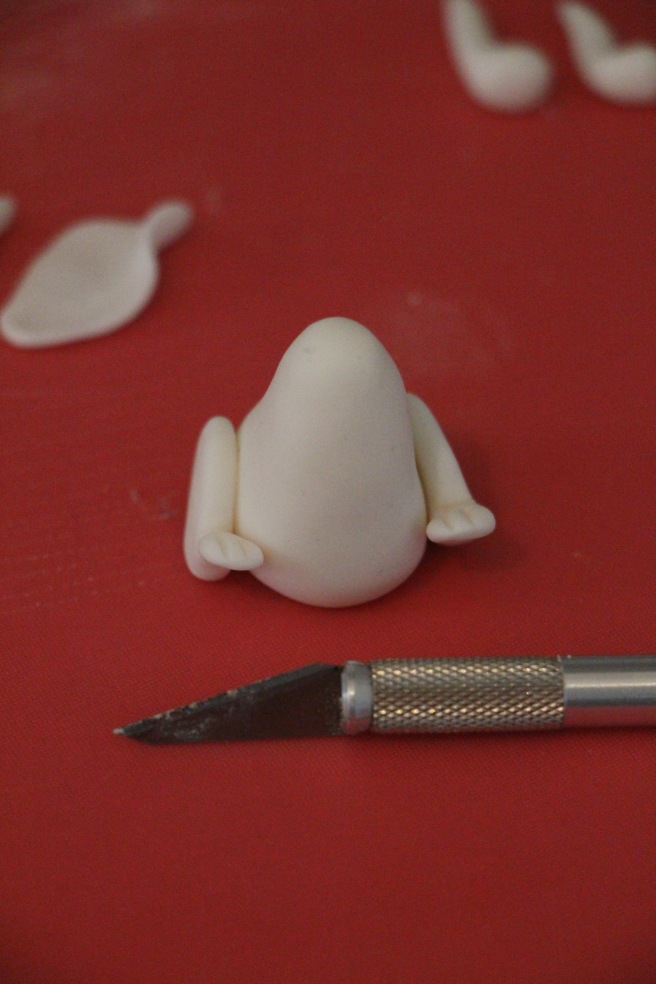
Afterwards, you can attach the little bunny tail to his bottom and also attach a tooth pick where the head is going to sit. This will provide some stability. Just warn your guests. 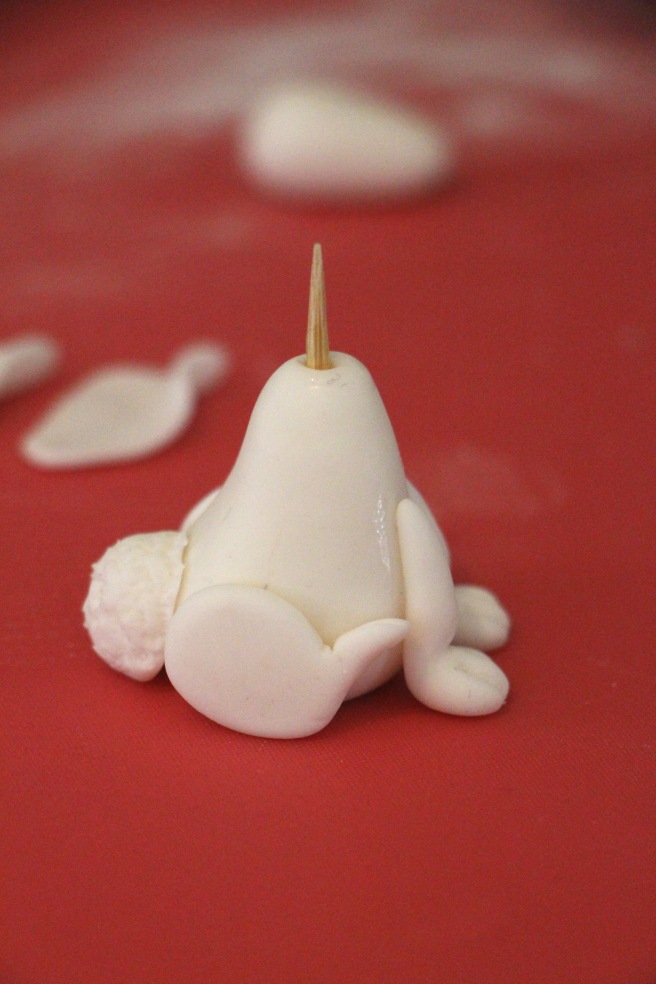
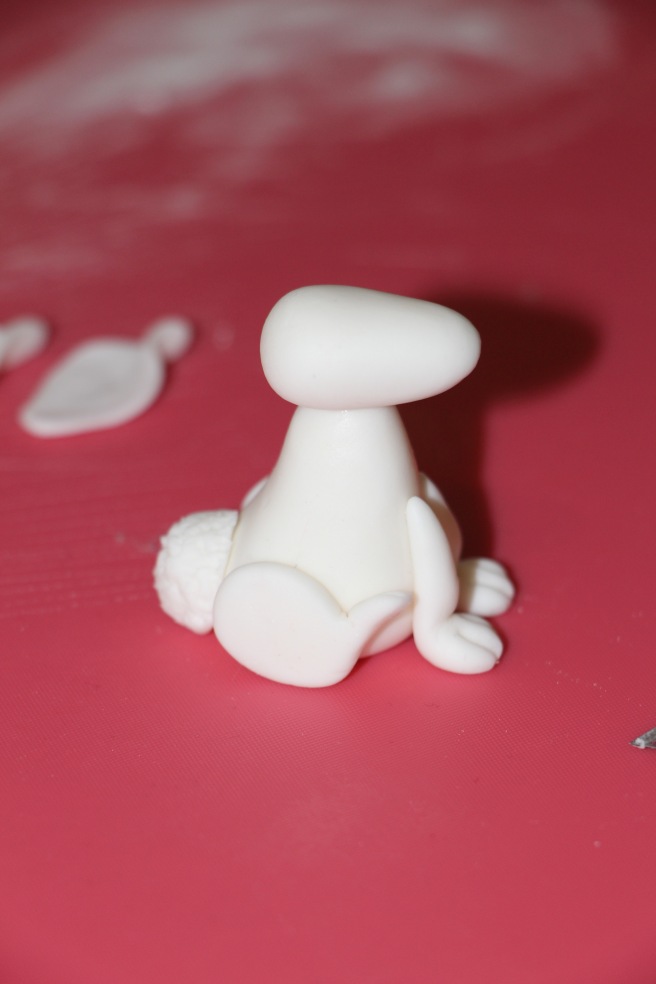
Attach the head and ears and using a ball tool, poke small indents where you want his eyes to be!
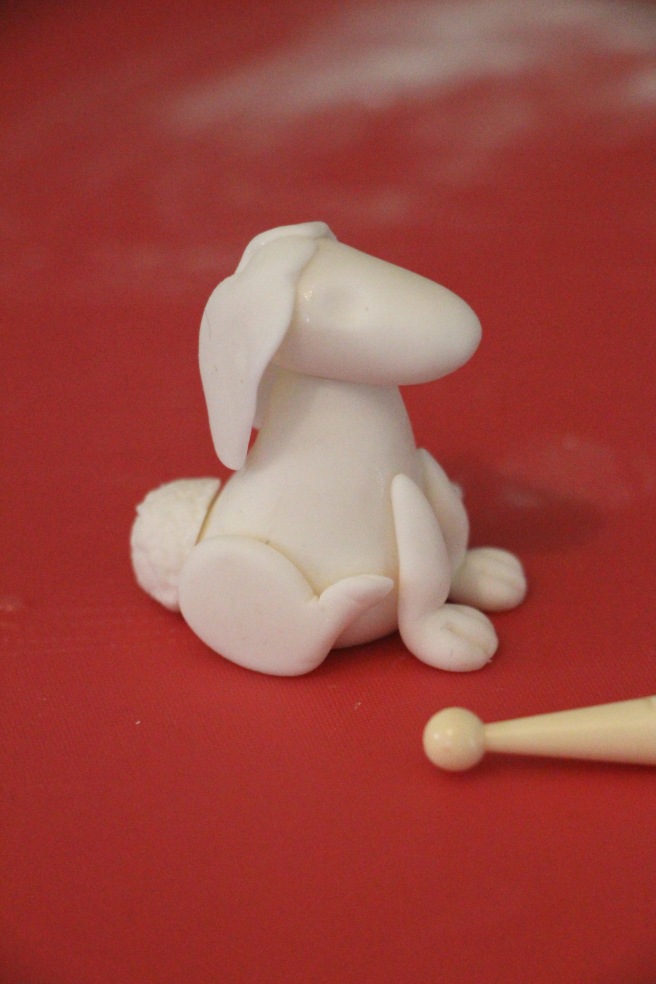
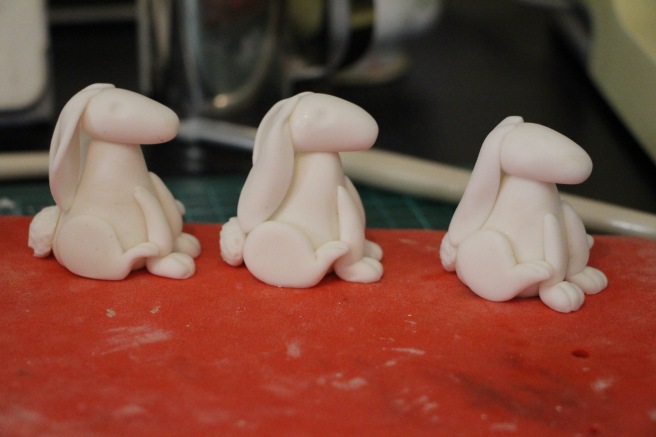
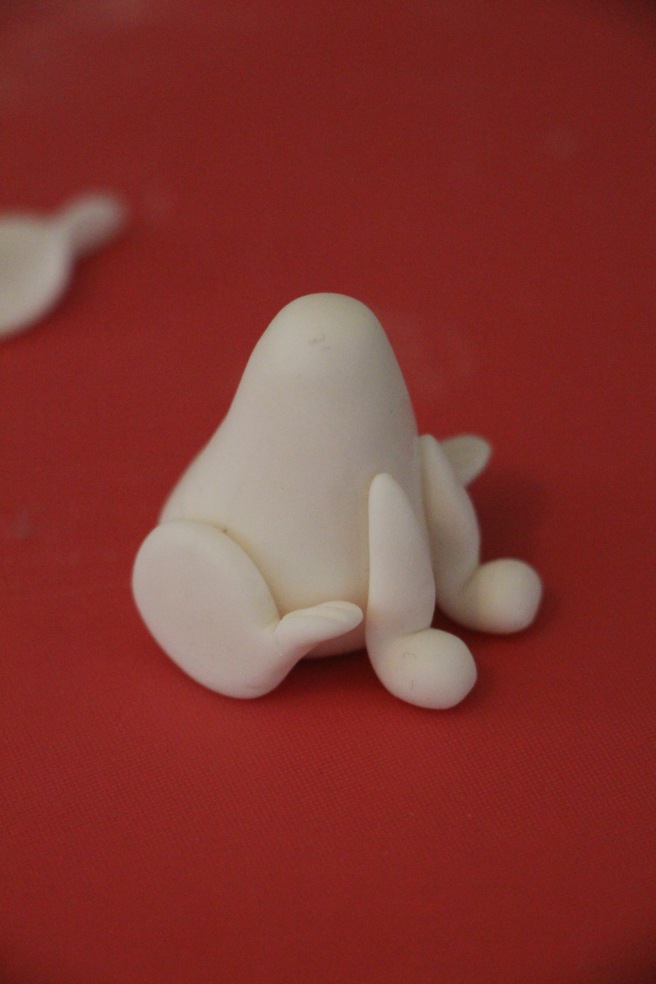
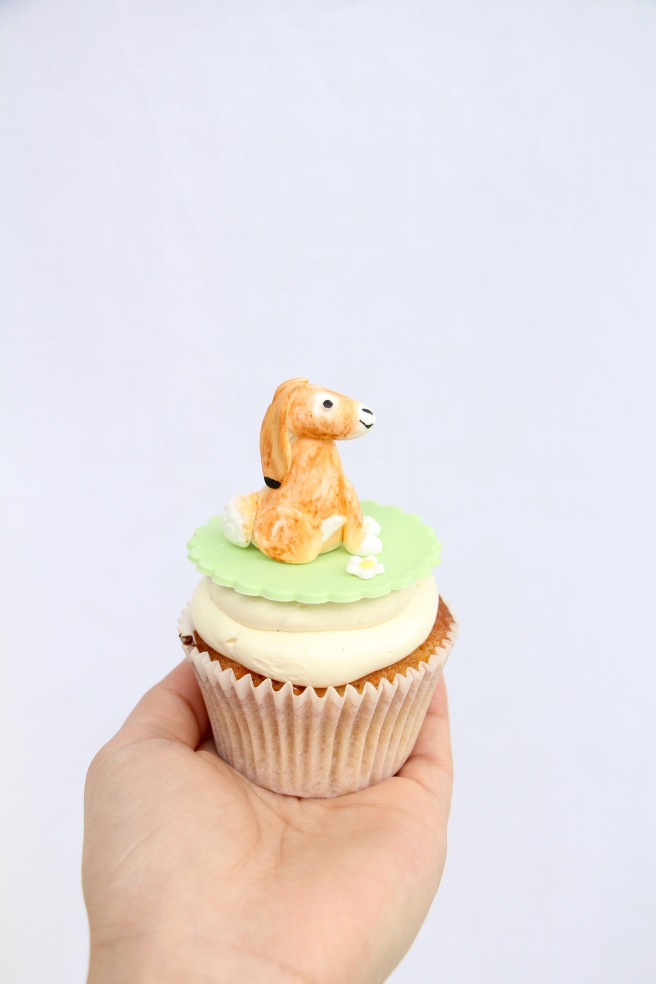
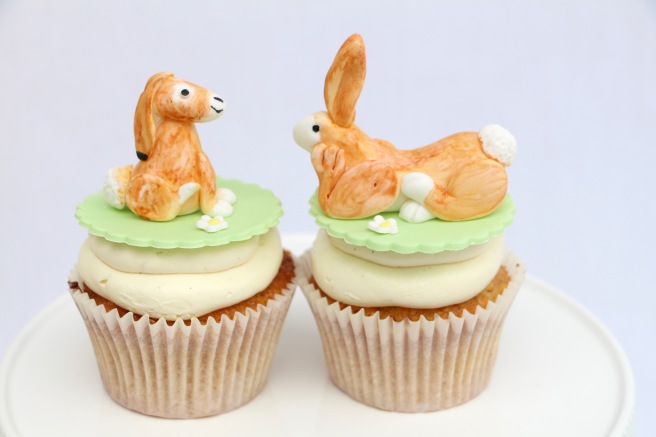
And voila! You have cute little un-painted bunnies, waiting to be brought to life! Simple shapes but oh so cute!
It’s best to leave them to dry over night before you start painting.
When you’re ready to paint select a few colours or powder colours that you think would work best, remember you can use this tutorial to make whatever bunny you like! If you want to make the little nut-brown hare in the same way i did then use these gel colours and dilute them with some clear-alcohol. I used rose spirit.

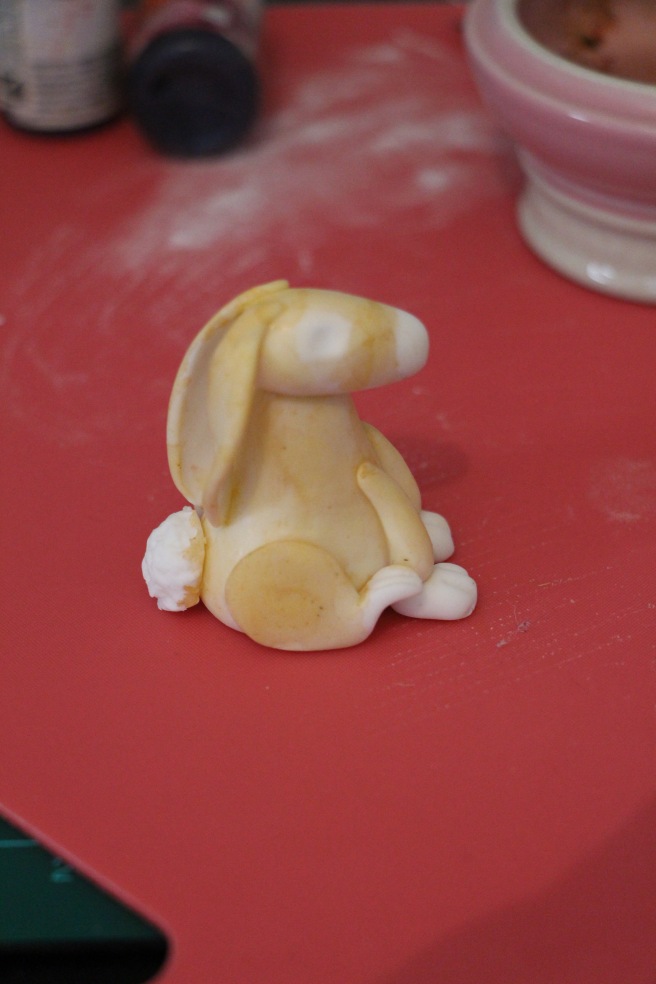
I began with a light coat and let it dry and then slowly added layers as i pleased. I used more of a spongey motion in comparison to a painted brush stroke, as i wanted to create a similar look to the book. As i wasn’t happy with just a flat look to the fur i ended up actually using a little bit of water over the paint to create the effect of “fur” which actually looked more like the story book, in my opinion.
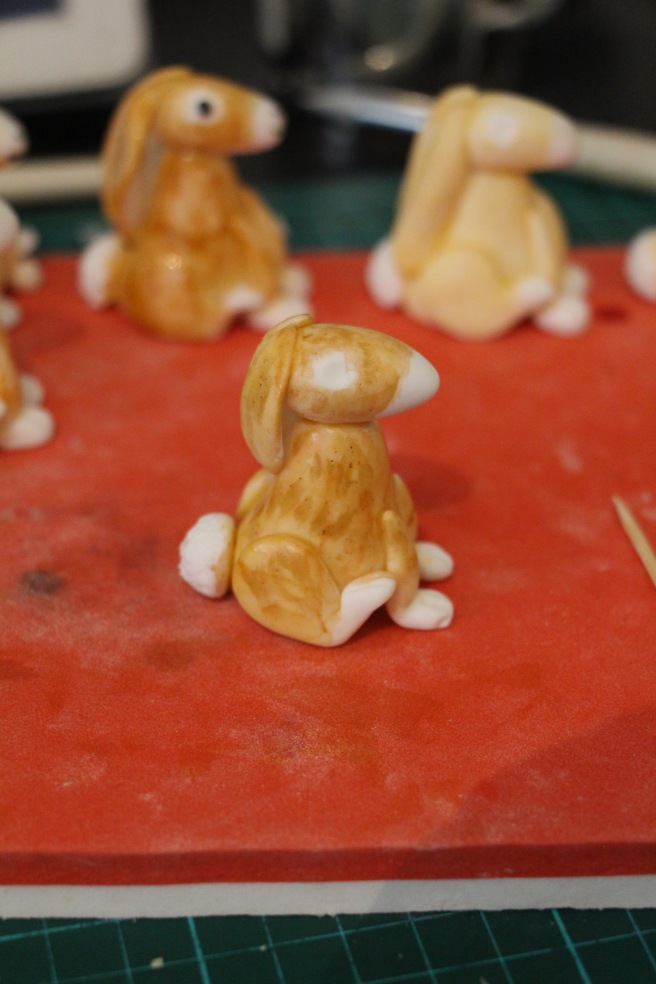
I also added little balls of white fondant for his eyes and painted a portion of it using black food gel (undiluted).
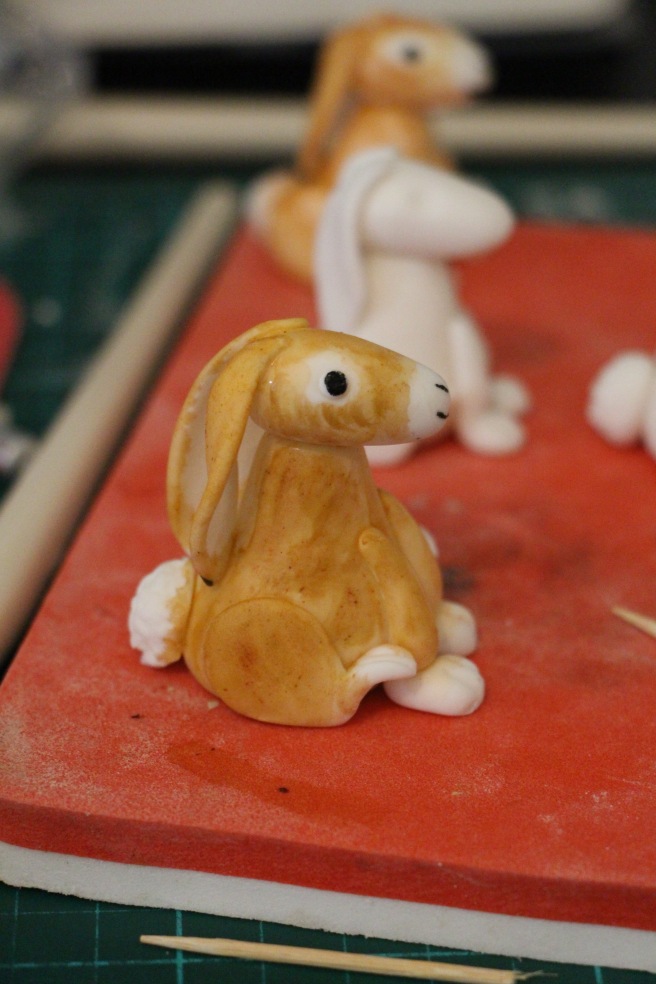


Aren’t they the cutest! Heres what they ended up looking like, which mimicked the scene from the story so beautifully.
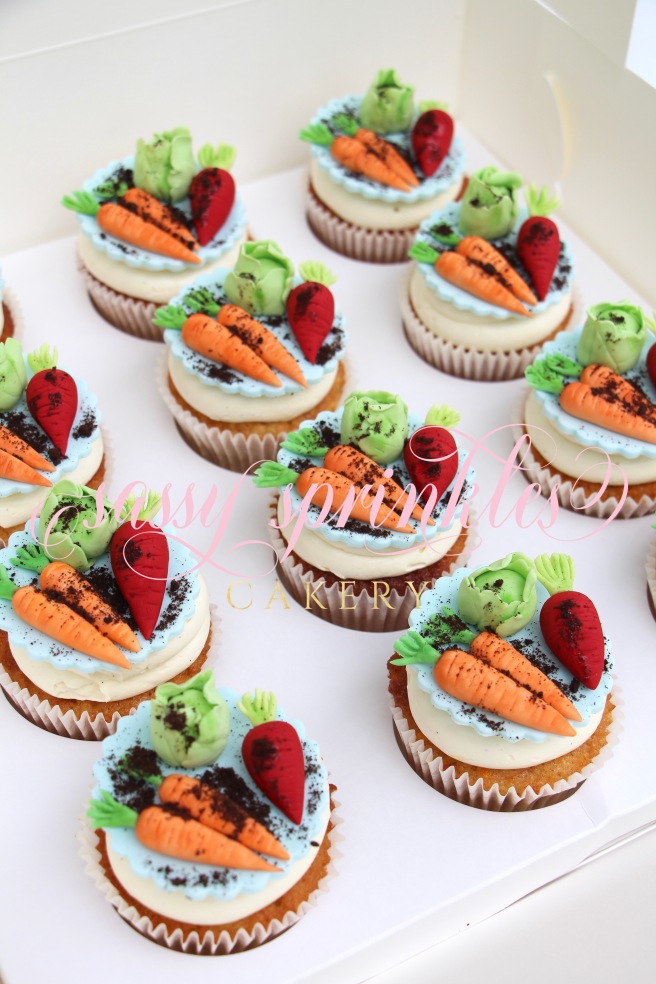
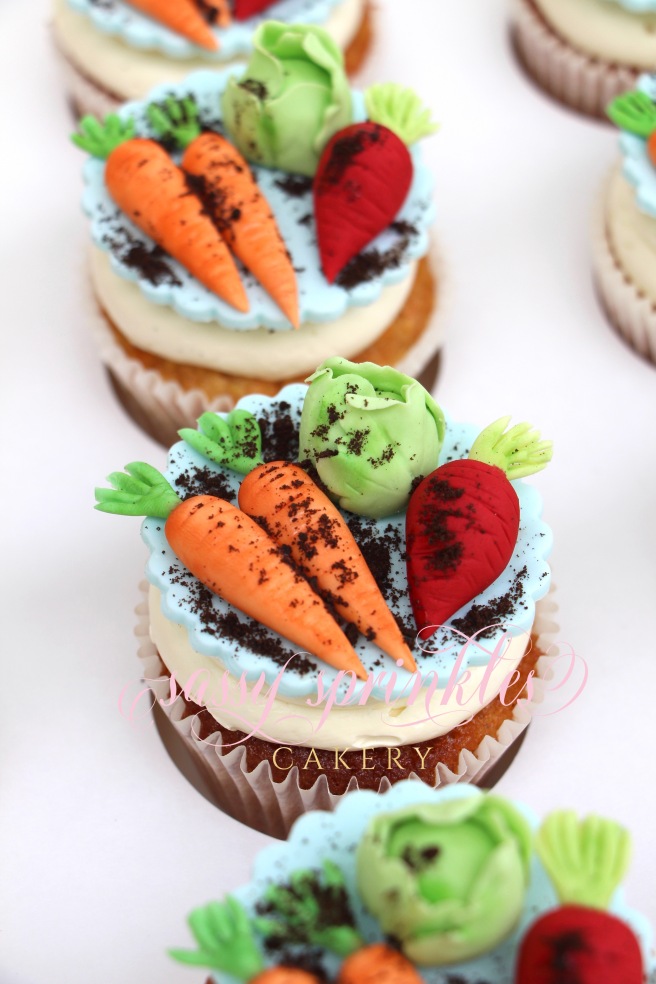
I also made some veggie patch cupcakes to go along with the theme, which I fell in love with!
I hope you all enjoyed the tutorial and learnt some new techniques that you can implement in your own creations!
Follow me and my cake journey on Instagram @sassysprinklescakery and if you want more sneak peeks add me on snapchat! @nellejas
As always, happy baking!
Love Nelle xox
